Previously, we created our OrderCloud trial subscription. Now, we will begin exploring its features.
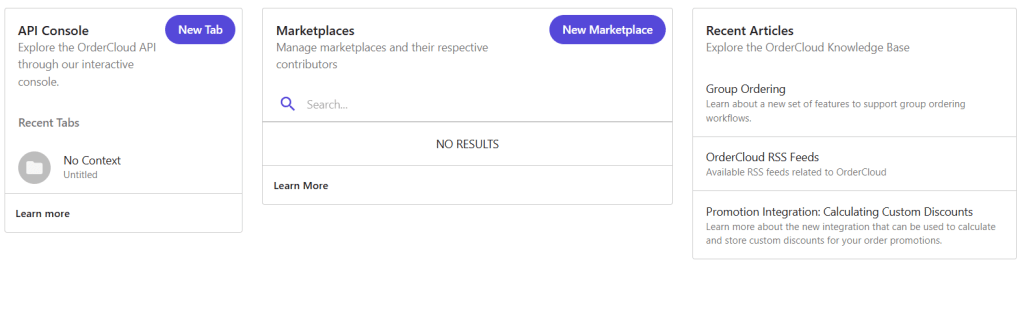
Here is a look at the main dashboard. It is necessary to create a Marketplace to start working, as it will serve as the global entity that stores our information.
OrderCloud’s interface stands out for being highly intuitive, providing direct access to its most important features. As we navigate deeper, we will uncover more detailed options.
For now, let’s click on New Marketplace to view the creation form.
If we have a specific region to create it, we select it; otherwise, we can leave the default region and simply enter the name before clicking Create Marketplace.

The marketplace information is then displayed. The Base URL will allow us to integrate our e-commerce solution with our Front-End application to serve the information.
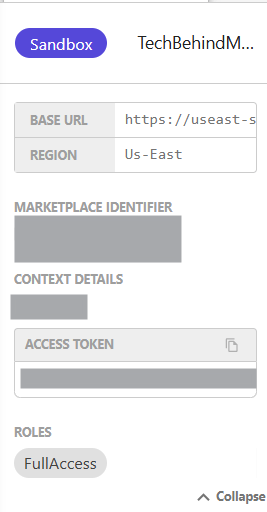
Now we can navigate into our marketplace. This entity already allows us to start working with our content through the API Console. Initially, we will see it empty, but we can already test the GET endpoints to confirm that everything is up and running.

There are several sections within the API Console, and we will review each of them as we dive deeper into the product.
It is very interesting to manage products through a graphical interface that lets us interact with the API calls. This approach is both simple and powerful, maintaining the flexibility to integrate information via RESTful services.
If you have any questions or comments, feel free to leave them below — I’ll be happy to help!
Don’t forget to check out the next post, where we will dive into managing Products, Categories, and Catalogs in OrderCloud.
